Setting up Azure
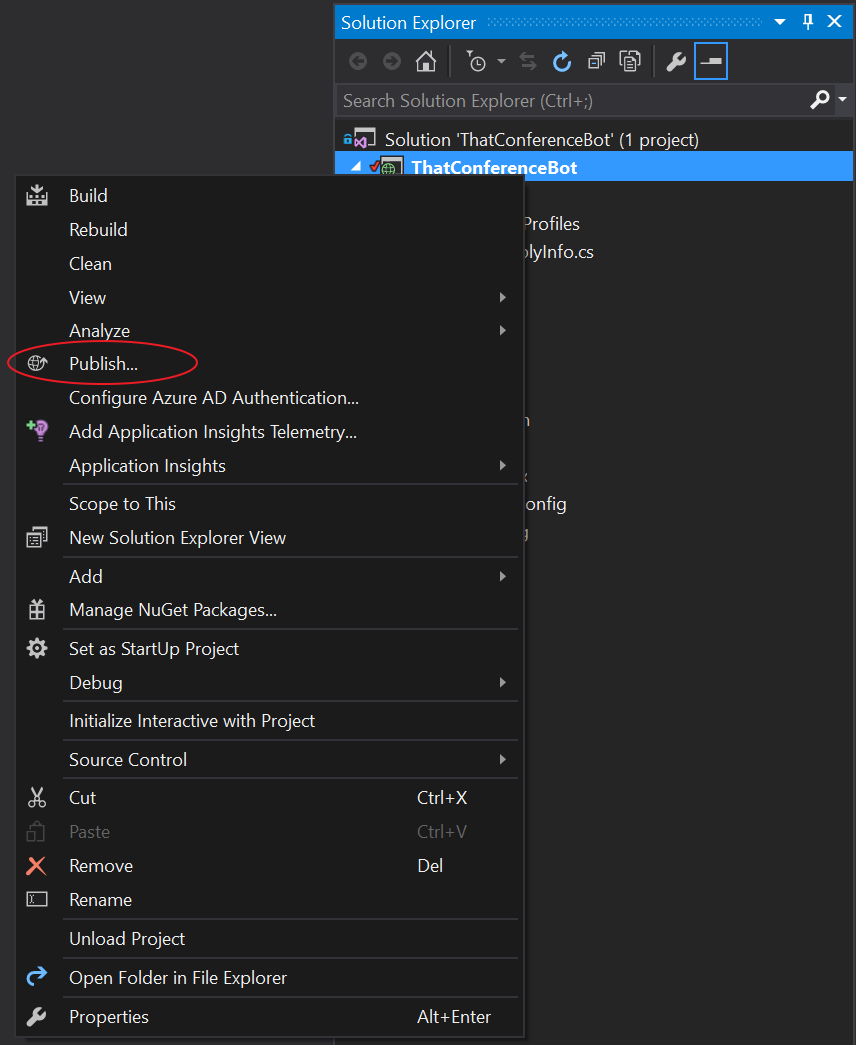
Uploading your app to Azure is incredibly simple. To begin, right click on your project in visual studio and select "Publish."
Your can then either select a Web App or an API app. I will be creating a Web App for this tutorial.

You will then have to select an Azure subscription. You will need to create a new Web App, so select the "New" button.

Select a web app name. This will be the domain name for your bot. You can then create a new app service plan, resource group, region, and database if you need one.

Once this is finished, everything should be automatically created for you. The next page should show some of this generated info such as your username, password, and site name.

Once that is finished, hit the "Publish" button, and you're done!
Using your bot in Azure
Using a bot in Azure takes a bit more effort than simply uploading it. The first thing that needs to be done is to create a new bot in the Microsoft Bot Directory. This can be found here: https://dev.botframework.com/bots. After signing in with your Microsoft ID, select "Register a Bot."

After filling in the required information about the bot, the app must be configured. The messaging endpoint will be the url of your bot in azure, followed by "api/messages." In my case, this was "https://thatconferencebot.azurewebsites.net/api/messages." Click Create Microsoft App ID and password.
IMPORTANT: Use https in your address instead of http. Using http will result in a 401 error when trying to communicate with your bot.

This will create a new App Id for your bot.

Select "Generate a password to continue." Save this password somewhere secure since it will never be shown again. Also note your App ID since you will need it later. The remaining fields with an asterisk also need to be filled in. The URLs don't have to be real until you publish your app. For now, you can enter in any URL in fields such as "Privacy Statement" and "Terms of Use."

Select "Register." This should finish the registration of the bot and display a page showing an overview of the bot.
After this, the newly created App ID and Password must be entered in the bot's Web.config. Add the values in as shown below:

After this is done, re-publish the bot as done before. All of the information should already be saved, so pressed the "Publish" button should automatically upload the new bot.
Once the new bot is uploaded, return to the bot directory with the newly created bot. On the bottom left of the screen is a button labeled "Test."

Pressing this button will verify that the connection between the bot connector and the bot running in Azure works correctly. If everything is set up correctly, a messaging saying "endpoint authorization succeeded" should display.
Testing the bot in Azure
Using the Bot Framework Emulator with your bot in azure takes a bit more work. Replacing the "Bot URL" with the url of a bot in azure will result in an error message:

Fortunately, this error message is very useful. It says to download a tool called ngrok found here and run it with "ngrok http -host-header=rewrite 9000." Simply download the exe file, open a command promp, and run that same command.

After running this command, ngrok should display a url that forwards to your port 9000.

Copy this url and paste it into your emulator.

After doing this, the error should disappear from the emulator. Now all you have to do is enter your app id and password on the right side of the emulator. If everything was done correctly, no errors should show up in any of the boxes.

Everything should now work exactly like before, except it is now running in Azure! Now you can integrate your bot into channels like Slack, Twilio, and more.
No comments:
Post a Comment